Apple Airpods have unique features that are activated through double tapping.
A few of them include: receiving calls, pausing and resuming audio content, and, most significantly, activating Siri.
However, specific faults or technicalities can develop within the phone or the Airpods that may hinder the function from working effectively.
This article highlights the possible reasons why Double-tap is not working on your Airpod and how to fix them.
Faulty or damaged sensors and an outdated iPhone iOS may be why the double tap function won’t work on your Airpods. Also, the double tap function might have been disabled from your phone settings; hence, you only need to enable it back. Or, you could just reset your Airpods, and the problem could solve itself immediately.
Why Are My Airpods Not Responding to Double Tap?
The reasons can range from damaged or faulty sensors to the Double function button being disabled unknowingly.
So, here is a detailed explanation of why your Airpods may not respond to double tap.
#1. Damaged Sensors
If your Airpods sensors are damaged, it will contribute to double-tap dysfunction. However, you might not notice if the sensors are bad unless it starts acting out.
A lot of things can damage the sensors. Sometimes, it can be a result of mishandling or general malfunction.
#2. Disabled Function Button
The function button is the one that helps to pause and play your audio. In addition, it also helps you take calls and end them.
Consequently, this is also where you double-tap to do the above functions. Unfortunately, if the button is disabled, it will not work.
Whichever reason it is, there are a few solutions you can try out to fix this problem. They include:
How Do I Fix the Double-tap on My Airpods?
The most common cause of this issue is when Double tap is not enabled or mistakenly disabled from the Apple device.
The process of resolving this issue is straightforward. If, however, you find your double-tap enabled already, disable it and enable it back again.
#1. Resetting Your Airpods
- First, place your Airpods into their charging cases and close the lid.
- Ensure the lid is closed correctly, and then wait for 30 seconds.
- After 30 seconds, open the lid of your charging case and bring out the Airpods.
- Switch on your iPhone or iPad and go to settings.
- Locate Bluetooth and click on the “More Info” icon.
- Click “Forget This Device,” then click on the icon to confirm the action.
- While the lid is open, press and hold the setup button at the back of the charging case for 20 seconds, continue to hold until you notice the status light flash amber, then white.
- Bring your Airpods close to your iPhone or iPad and follow the screens’ highlighted steps and instructions.
- It is important to note that Airpods are linked to a particular Apple ID.
Hence, you cannot use another iPhone user’s Airpods without them disconnecting the Airpods from their Apple ID before handing them over to you.
#2. Updating Your iOS
The iOS version of your Apple device can no longer support your Airpods.
Updating your device will fix the bugs and errors and improve your device to enable access to newer features.
Below are the instructions to follow when updating your Apple device:
- Click on the Menu bar and move to “Settings.”
- When you get to settings, select “About.”
- Check your software’s version and see if there are newer updates.
- If there are newer updates, download that version to your Apple device immediately.
- Install the updated version.
#3. Switch Off Automatic Ear Detection
Automatic Ear Detection enables the iPhone or iPad to pause audio content when the Airpods are taken off and resume when they are hung back.
Automatic Ear Detection might seem unrelated, but it can cause the double tap function to malfunction.
Here are the steps to follow when switching off the Automatic Ear Detection:
- First, locate “Settings” on your device.
- Next, find and click on “Bluetooth.”
- Select the “More Info” icon
- Click on “Automatic Ear Detection” at the bottom of the settings.
- Switch off the Automatic Ear Detection.
If your double-tap function still needs to be fixed after trying all the procedures above, you can try contacting Apple’s customer support service through this link.
Apple has 2 types of Airpods with distinctive qualities that differentiate one from the other. First, there is the regular Apple Airpod and the Apple Airpod Pro.
The Airpod Pro is more technologically advanced than the regular Airpod; hence, it is prone to fewer faults and irregularities.
However, the table below highlights the significant differences between both Apple headphones.
| Apple Airpod | Apple Airpod Pro |
|---|---|
| Cheaper and much more readily available. | Expensive. |
| No noise cancellation. | Flexible active noise cancellation. |
| Non-water-resistant. | Water-resistant. |
| It does not support Spatial audio. | It supports Spatial audio. |
Below are instructions on how to fix Double-tap on your Airpods:
- First, locate and launch “Settings” on your Apple device.
- Next, move to “Bluetooth” and activate it.
- Finally, click on the “Info” icon.
- Scroll down the screen to the section you find “Double-tap on Airpod.”
- Click left from the options highlighted on the screen.
- Select “Play/Pause” to activate double-tap on your left Airpod.
- Leave the section and head back to the “Airpods Option” screen.
- Click right
- Select “Play/Pause” from the options highlighted for double-tap on the right Airpod. You will find 5 options highlighted for double-tap.
- Now, test the Airpods to ensure double-tap is functioning in both Airpods.
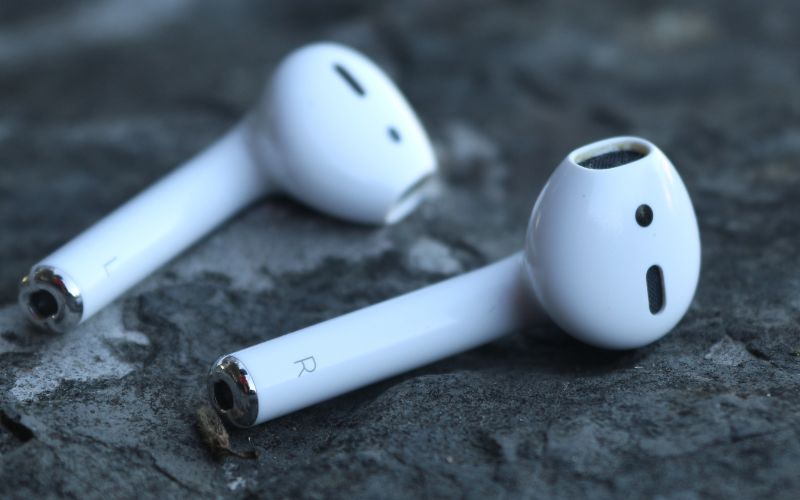
Sometimes the Airpods may be fine. And the problem might be that you need to tap the Airpod at the right spot.
The area where the sensors are attached to the Airpods is right above the stem of the Airpod.
If you tap too far below the stem, there is a high likelihood the sensors will not grasp your command.
After double-tapping on your Airpod or disabling and enabling back again, try double-tapping again in the right spot just above the Airpods stem.
An Apple Airpod Pro bears a slight difference compared to the regular Airpod. For the Airpod Pro, the right spot to tap is on the grooved surface of its stem.
Also, the Airpod Pro uses a force sensor to ensure feedback for commands. So only force or tap slowly when tapping on the Airpod Pro.
The Airpods are programmed to respond to an average human tapping speed. You should only discard or purchase new Airpods if the sensors are damaged beyond repair.
How Do I Fix My Airpod Controls?
Here are a few Airpod control challenges you might be experiencing and their solutions:
#1. Changing the Press-And-Hold Function
This function mainly concerns the Apple Airpod Pro. The action of pressing and holding the Airpods’ force sensor on the stem alternates between the 3 noise control modes.
The 3 noise control modes for the Airpod Pro are Active Noise Cancellation, Transparency mode, and Off.
You can select the noise control modes you want to enable using the “Press and Hold” action.
Below are the instructions to do this:
- On your Apple device, locate and launch “Settings.”
- Next, go to “Bluetooth.”
- Next, click on the “More Info” icon.
- Finally, scroll to “Press and Hold Airpods.”
- Choose the 2 or 3 noise control modes you wish to function with the “Press and Hold” action.
- Don’t worry about going through the same process with the left and right AirPods. The change will affect both AirPods simultaneously.
#2. Set Microphone to Either the Left or Right Airpod
This action will allow you to switch the microphone function from both Airpods to just one. This way, you can still use one of the Airpods. Usually, this comes in handy when an iPhone user misplaces an Airpod or stops working.
The steps for enabling this function are as follows:
- First, locate and click on “Settings” on your Apple device.
- Click on Bluetooth
- Scroll through the “My Devices” list and the “I” icon.
- Click on “Microphone”
- Select either “Always Left Airpod” or “Always Right Airpod.”
How to Enable Double-tap on Airpod
Enabling Double-tap back on your Airpod is quite simple. All you have to do is follow the steps below:
- Locate and select “Settings” on your iPhone or iPad
- Select “Bluetooth”
- Click on “Info”
- The screen will display 2 option icons for both left and right AirPods
- Click on both icons.
You could also assign different commands that will operate using the double-tapping action.
Why is Double-tap on Airpod Not Showing
The only reason the double-tap on your Airpod is not showing is that you still need to enable it.
To solve this issue, you can follow the steps below:
- First, go to “Settings” on your Apple device.
- Click on Bluetooth
- Select the “I” icon
- Hold and press down on both the volume and side buttons to restart your device.
Summary
Issues such as an outdated IOS, faulty sensors, or a disabled double-tap can cause the double-tap function to cease working.
You could fix these issues by resetting the Airpods, updating your IOS, or enabling the double-tap function on your Apple device.
Also, remember the correct spot to double-tap on an Apple Airpod and Airpod Pro is just above its stem.
